> ## Documentation Index
> Fetch the complete documentation index at: https://docs.linqra.com/llms.txt
> Use this file to discover all available pages before exploring further.
# Edge Service
> Configure and manage the Linqra Edge Service
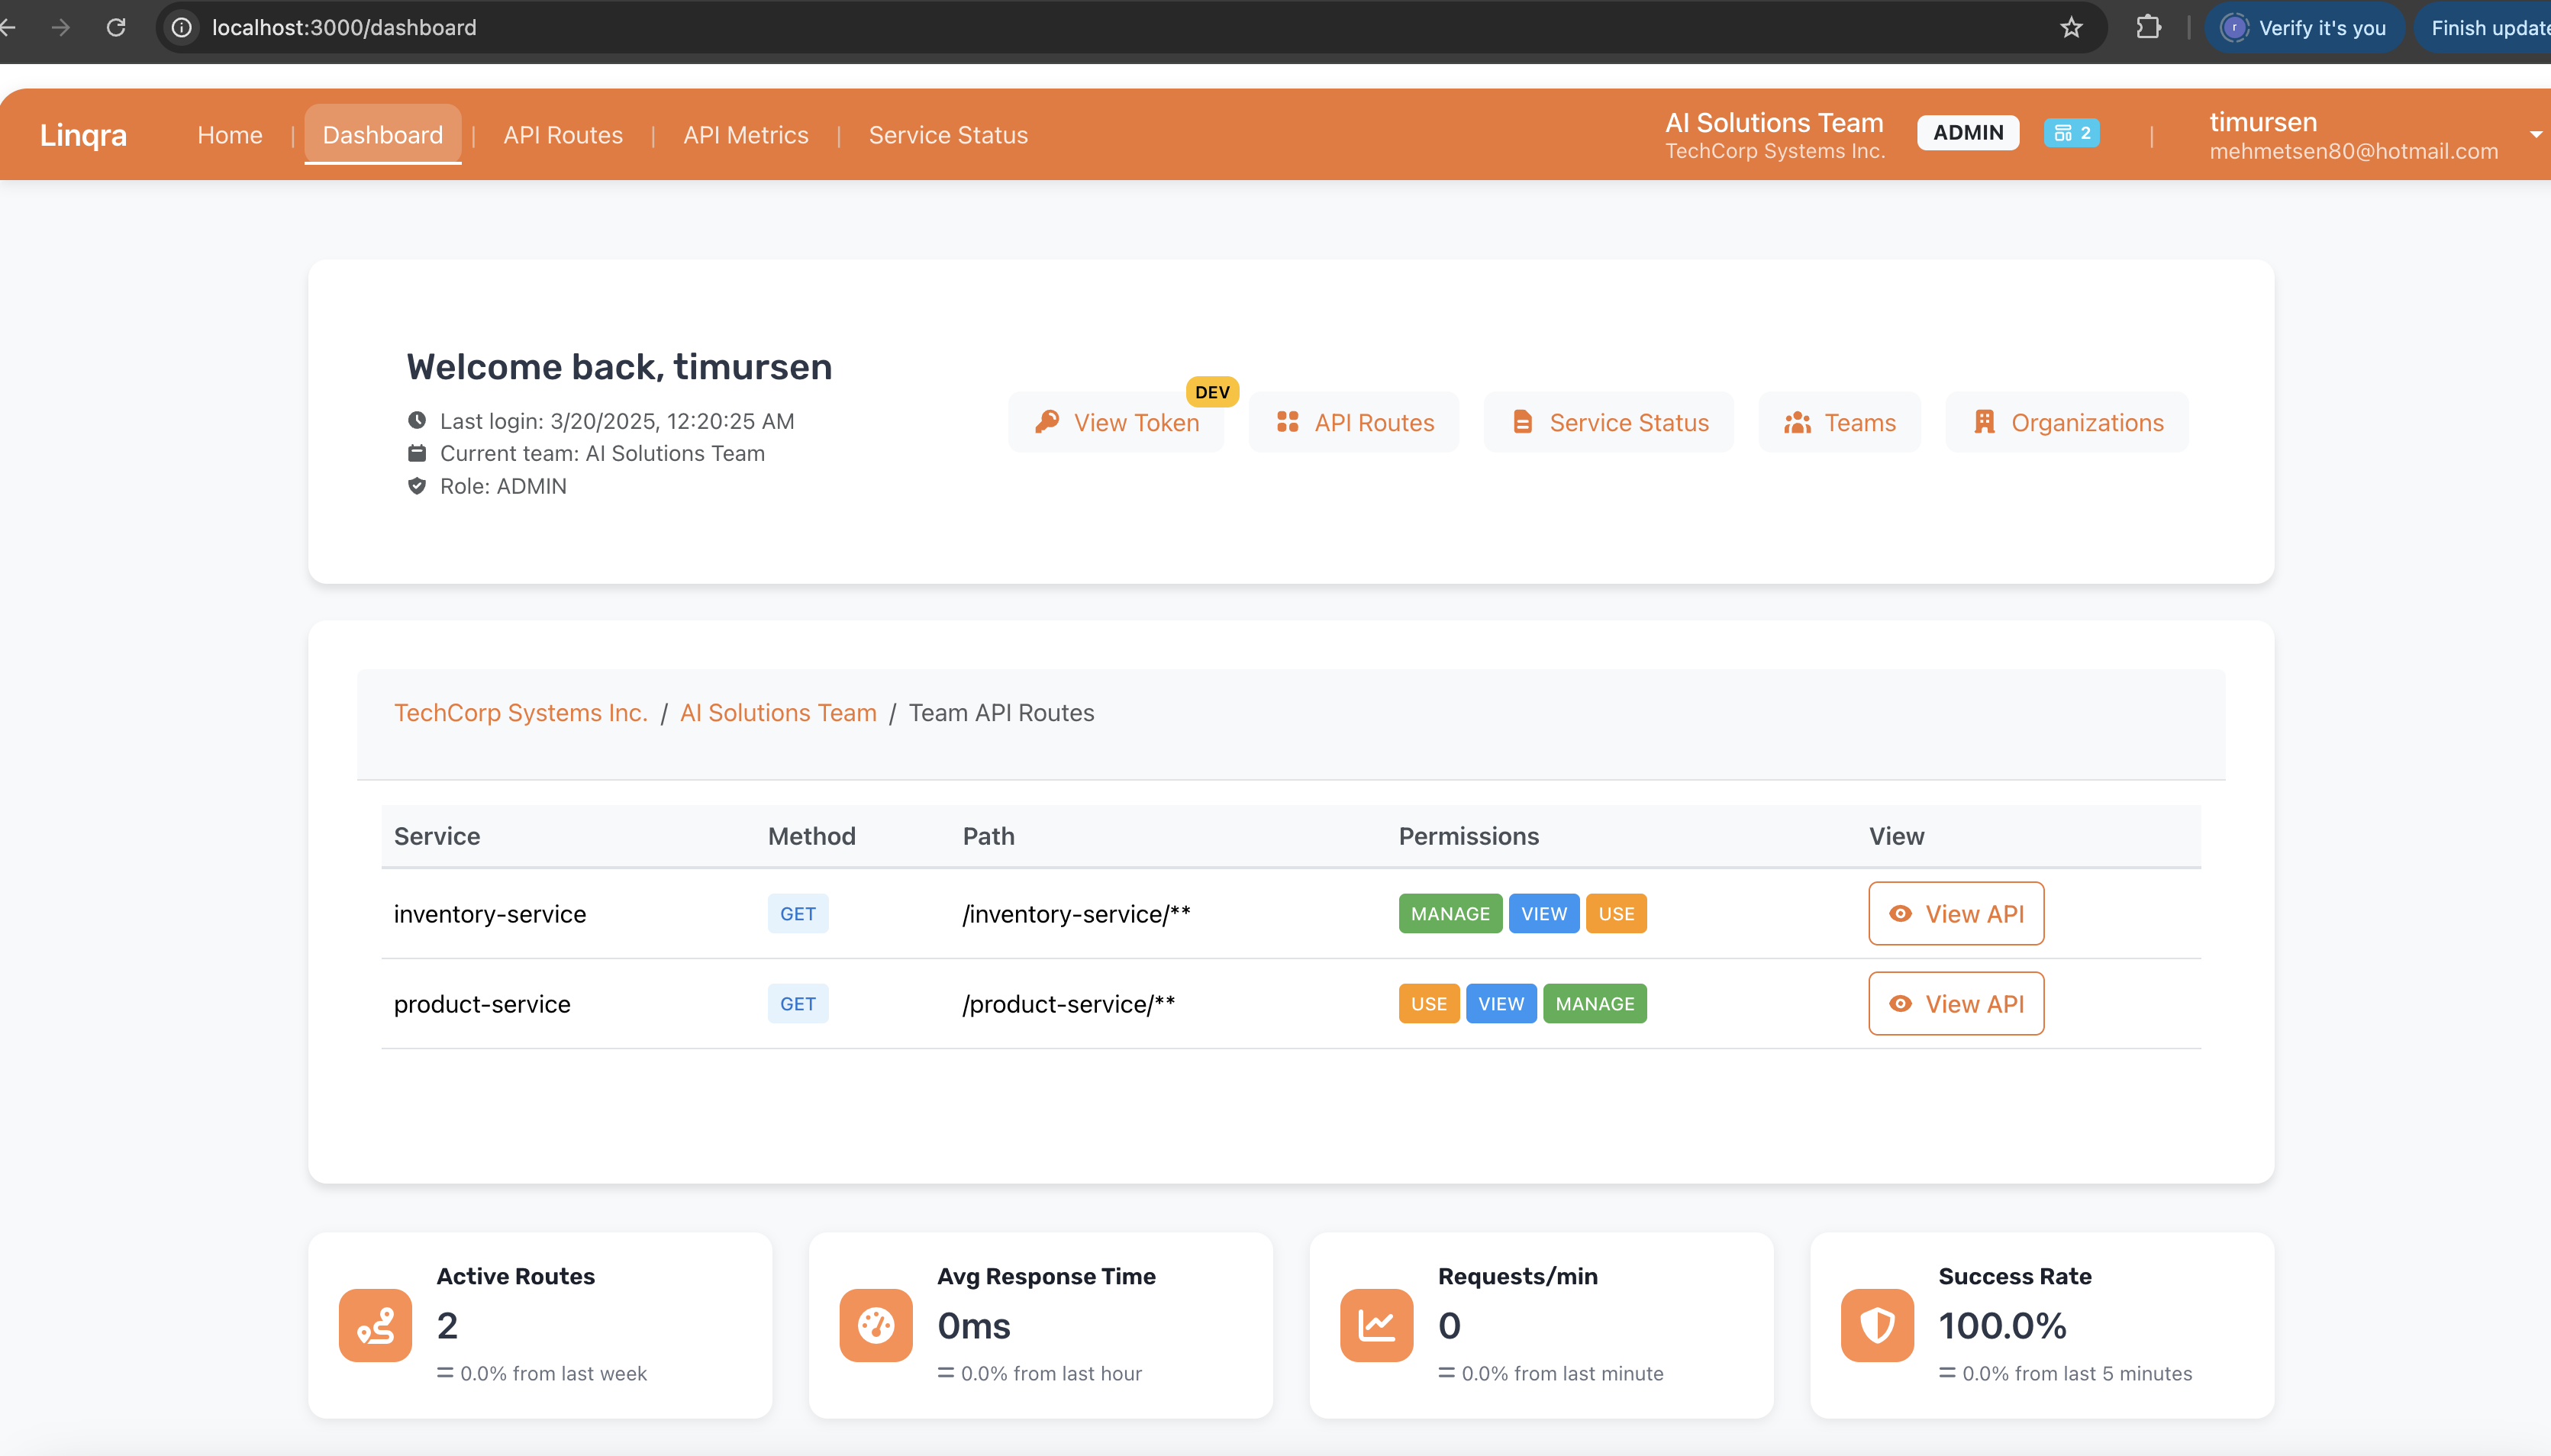
The Edge Service is the central gateway for all Linqra microservices, providing routing, security, and monitoring capabilities.
 ## Initial Setup
### Creating a Super Admin
The first step in setting up the Edge Service is to create a super admin account. This can be done via an API call to the initialization endpoint:
1. Start the Edge Service with:
```bash theme={null}
$ sudo npm run dev
```
2. Use a REST client (like Postman or cURL) to make a POST request to the initialization endpoint:
```
POST https://localhost:7777/api/setup/init
```
With the following JSON body:
```json theme={null}
{
"username": "linqrasa",
"email": "johndoe@example.app",
"password": "Something12345$"
}
```
## Initial Setup
### Creating a Super Admin
The first step in setting up the Edge Service is to create a super admin account. This can be done via an API call to the initialization endpoint:
1. Start the Edge Service with:
```bash theme={null}
$ sudo npm run dev
```
2. Use a REST client (like Postman or cURL) to make a POST request to the initialization endpoint:
```
POST https://localhost:7777/api/setup/init
```
With the following JSON body:
```json theme={null}
{
"username": "linqrasa",
"email": "johndoe@example.app",
"password": "Something12345$"
}
```
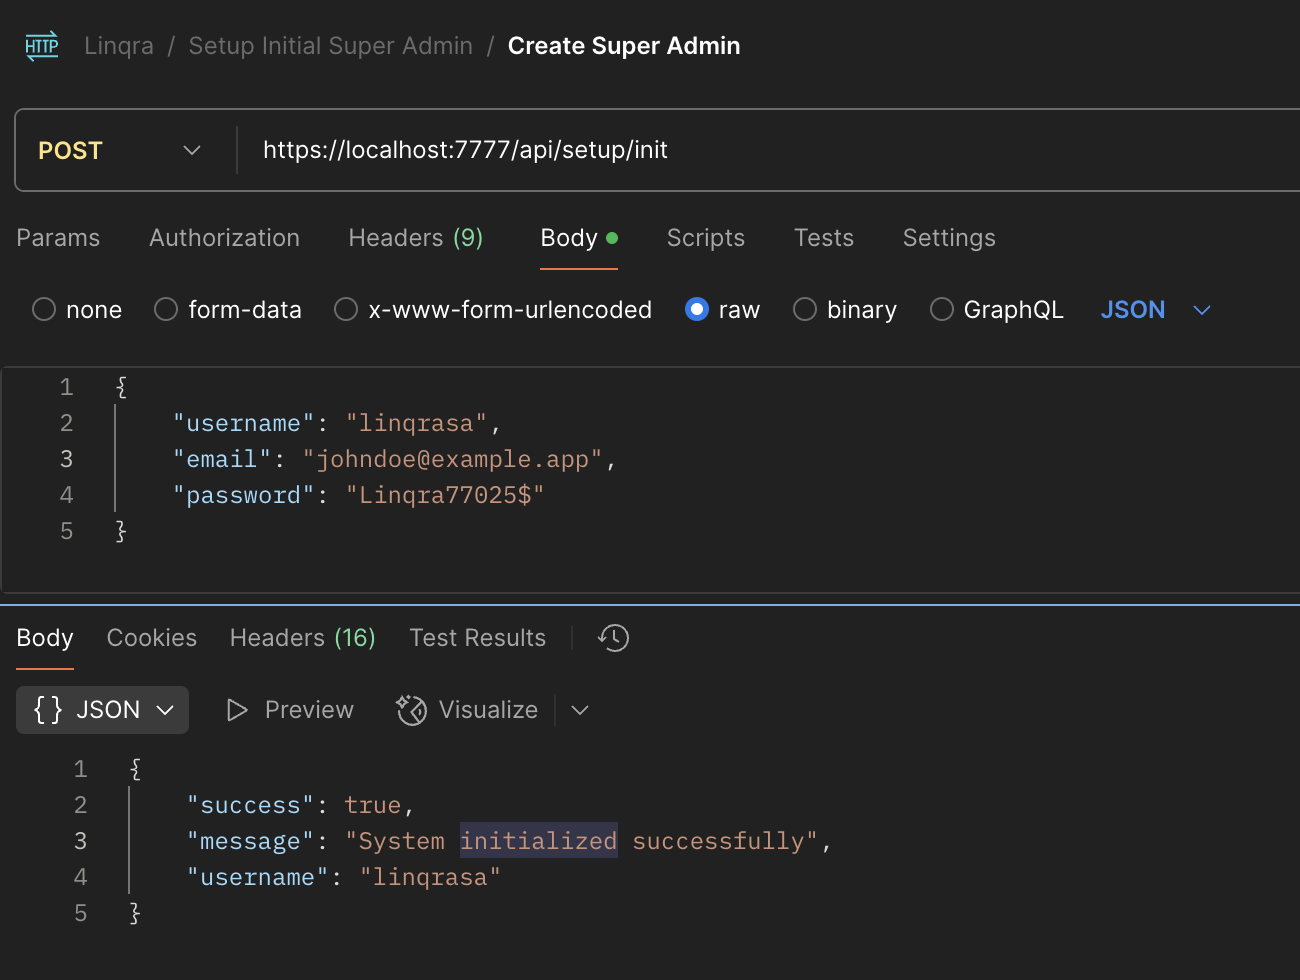 3. Upon successful initialization, you'll receive a response confirming the system has been initialized with your super admin account:
```json theme={null}
{
"success": true,
"message": "System initialized successfully",
"username": "linqrasa"
}
```
### Accessing the Admin Interface
After creating the super admin account, you can access the Edge Service admin interface:
1. Navigate to `https://localhost:3000` in your browser
2. Log in with the username and password you created in the previous step
## Organization and Team Management
Before configuring API routes, you should set up your organizational structure:
1. Navigate to the **Organizations** section in the sidebar
2. Click **Create Organization** and fill in the required details
3. Once your organization is created, go to the **Teams** section
4. Click **Create Team** to create teams within your organization
5. Assign appropriate permissions and members to each team
## API Route Configuration
After setting up your organizational structure, you can begin creating API routes for your microservices.
### Creating an API Route
1. Navigate to the **API Routes** section in the admin interface
2. Click **Create New API Route**
3. Fill in the following details:
* **Select Team**: Choose the team that will own this route (e.g., "AI Solutions Team")
* **Route Identifier**: A unique identifier for the route (e.g., "inventory-service")
* **Path**: The path pattern to match for this route (e.g., "/inventory-service/\*\*")
* **URI**: The target service URI where requests will be forwarded (e.g., "lb://inventory-service")
* **Scope**: Define the access scope for this route (e.g., "inventory-service.read")
3. Upon successful initialization, you'll receive a response confirming the system has been initialized with your super admin account:
```json theme={null}
{
"success": true,
"message": "System initialized successfully",
"username": "linqrasa"
}
```
### Accessing the Admin Interface
After creating the super admin account, you can access the Edge Service admin interface:
1. Navigate to `https://localhost:3000` in your browser
2. Log in with the username and password you created in the previous step
## Organization and Team Management
Before configuring API routes, you should set up your organizational structure:
1. Navigate to the **Organizations** section in the sidebar
2. Click **Create Organization** and fill in the required details
3. Once your organization is created, go to the **Teams** section
4. Click **Create Team** to create teams within your organization
5. Assign appropriate permissions and members to each team
## API Route Configuration
After setting up your organizational structure, you can begin creating API routes for your microservices.
### Creating an API Route
1. Navigate to the **API Routes** section in the admin interface
2. Click **Create New API Route**
3. Fill in the following details:
* **Select Team**: Choose the team that will own this route (e.g., "AI Solutions Team")
* **Route Identifier**: A unique identifier for the route (e.g., "inventory-service")
* **Path**: The path pattern to match for this route (e.g., "/inventory-service/\*\*")
* **URI**: The target service URI where requests will be forwarded (e.g., "lb://inventory-service")
* **Scope**: Define the access scope for this route (e.g., "inventory-service.read")
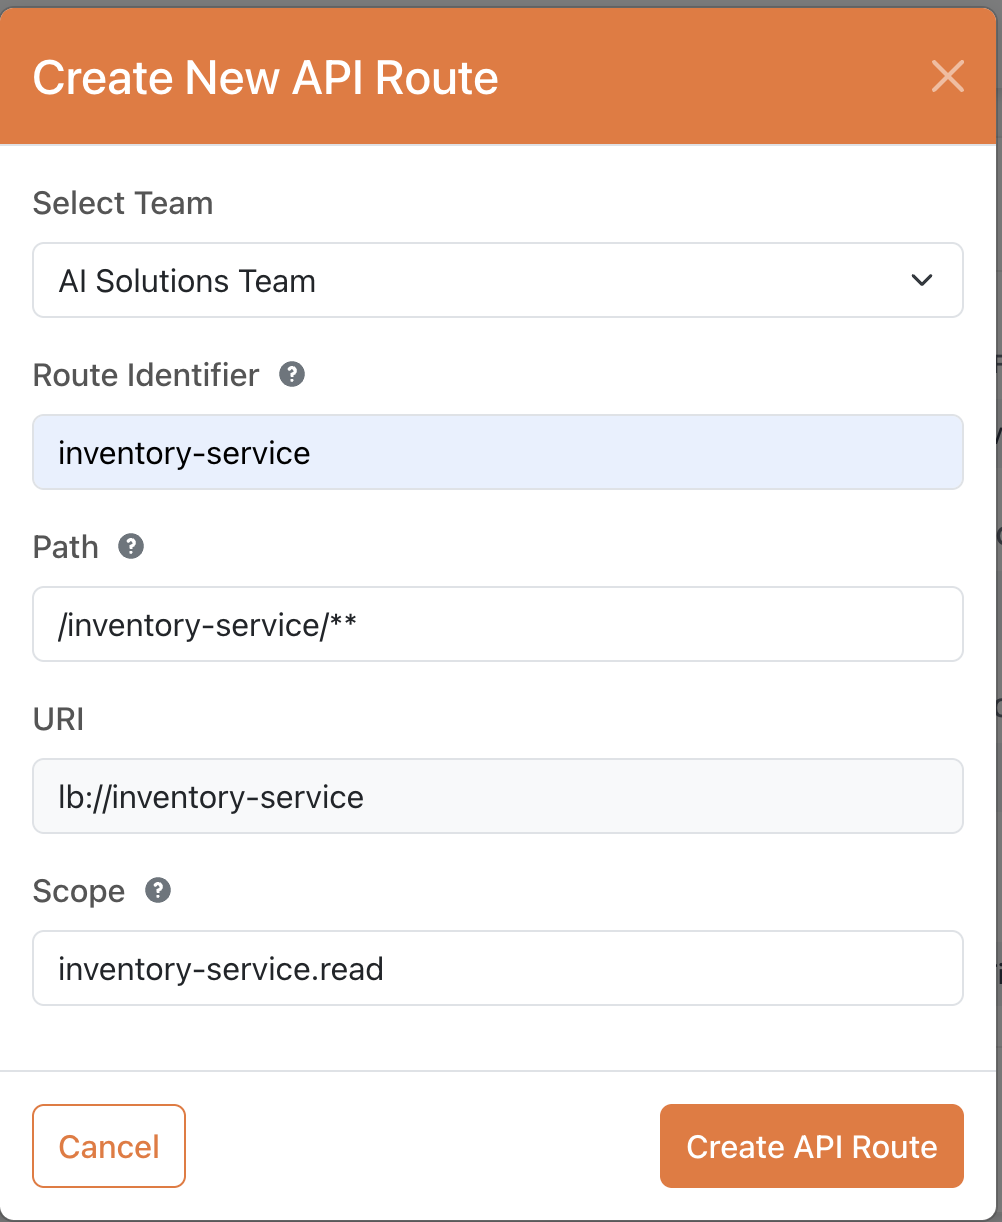 4. Click **Create API Route** to save your configuration
### Understanding Route Configuration Fields
* **Team**: Associates the route with a specific team for governance and access control
* **Route Identifier**: A unique name used internally to identify the route
* **Path**: The URL path pattern that will trigger this route (supports wildcards)
* **URI**: The destination service address
* Use `lb://service-name` format for load-balanced services registered with Eureka
* Use direct URLs like `https://internal-service:8080` for services not registered with Eureka
* **Scope**: OAuth 2.0 scopes required to access this route
### Advanced Route Configuration
Each API route can be further customized with:
* **Rate Limiting**: Control how many requests can be made within a time period
* **Circuit Breaking**: Define failover behavior when a service is unresponsive
* **Request Transformation**: Modify requests before they reach the target service
* **Response Transformation**: Modify responses before they are returned to the client
* **Security Policies**: Apply authentication and authorization requirements
## Connecting Microservices
For a microservice to be accessible through the Edge Service:
1. Ensure the microservice is registered with Eureka (if using service discovery)
2. Create an API route pointing to the microservice
3. Configure the microservice to accept requests from the Edge Service
4. Set up appropriate security between the Edge Service and the microservice
Example configuration for a microservice to work with the Edge Service:
```yaml theme={null}
# In your microservice's application.yml
spring:
application:
name: inventory-service # Must match the service name in the lb:// URI
eureka:
client:
service-url:
defaultZone: https://localhost:8761/eureka
register-with-eureka: true
```
## Monitoring and Observability
The Edge Service provides comprehensive monitoring capabilities:
* **Request Metrics**: View throughput, latency, and error rates for each route
* **Service Health**: Monitor the status of connected microservices
* **Audit Logs**: Track administrative actions and security events
* **Usage Analytics**: Analyze API usage patterns by team, route, or client
### Viewing Service Metrics
To view service metrics:
1. Navigate to the **Monitoring** section in the admin interface
2. Select the time period you wish to analyze
3. Filter by service, route, or team to narrow down the results
4. Export reports in various formats for further analysis
## Security Considerations
When configuring the Edge Service, keep these security best practices in mind:
1. Use strong passwords for admin accounts
2. Implement the principle of least privilege for team permissions
3. Regularly rotate API keys and credentials
4. Enable TLS for all service-to-service communication
5. Configure appropriate CORS policies for browser-based clients
6. Implement IP-based access controls where appropriate
### JWT Token Configuration
The Edge Service can be configured to validate JWT tokens issued by Keycloak:
```yaml theme={null}
spring:
security:
oauth2:
resourceserver:
jwt:
issuer-uri: https://keycloak.example.com/realms/linqra
```
By following these guidelines, you can effectively manage and secure your Linqra microservices architecture through the Edge Service.
## Troubleshooting
### Common Issues
* **Service Not Found**: Verify the service is registered with Eureka and the service name matches the lb:// URI
* **Authorization Failure**: Check that the required scopes are correctly set and the user has the necessary permissions
* **Invalid Routes**: Ensure the path patterns don't conflict with other routes
* **Performance Issues**: Monitor rate limiting and circuit breaking configurations
### Logs and Diagnostics
The Edge Service logs can be found at:
```
logs/edge-service.log
```
Increase logging level for detailed diagnostics:
```yaml theme={null}
logging:
level:
org.springframework.cloud.gateway: TRACE
org.springframework.security: DEBUG
```
## Next Steps
After configuring the Edge Service, consider:
* Setting up a production-ready deployment with high availability
* Implementing a CI/CD pipeline for route configuration
* Integrating with external monitoring and alerting systems
* Developing custom filters and predicates for specialized routing needs
4. Click **Create API Route** to save your configuration
### Understanding Route Configuration Fields
* **Team**: Associates the route with a specific team for governance and access control
* **Route Identifier**: A unique name used internally to identify the route
* **Path**: The URL path pattern that will trigger this route (supports wildcards)
* **URI**: The destination service address
* Use `lb://service-name` format for load-balanced services registered with Eureka
* Use direct URLs like `https://internal-service:8080` for services not registered with Eureka
* **Scope**: OAuth 2.0 scopes required to access this route
### Advanced Route Configuration
Each API route can be further customized with:
* **Rate Limiting**: Control how many requests can be made within a time period
* **Circuit Breaking**: Define failover behavior when a service is unresponsive
* **Request Transformation**: Modify requests before they reach the target service
* **Response Transformation**: Modify responses before they are returned to the client
* **Security Policies**: Apply authentication and authorization requirements
## Connecting Microservices
For a microservice to be accessible through the Edge Service:
1. Ensure the microservice is registered with Eureka (if using service discovery)
2. Create an API route pointing to the microservice
3. Configure the microservice to accept requests from the Edge Service
4. Set up appropriate security between the Edge Service and the microservice
Example configuration for a microservice to work with the Edge Service:
```yaml theme={null}
# In your microservice's application.yml
spring:
application:
name: inventory-service # Must match the service name in the lb:// URI
eureka:
client:
service-url:
defaultZone: https://localhost:8761/eureka
register-with-eureka: true
```
## Monitoring and Observability
The Edge Service provides comprehensive monitoring capabilities:
* **Request Metrics**: View throughput, latency, and error rates for each route
* **Service Health**: Monitor the status of connected microservices
* **Audit Logs**: Track administrative actions and security events
* **Usage Analytics**: Analyze API usage patterns by team, route, or client
### Viewing Service Metrics
To view service metrics:
1. Navigate to the **Monitoring** section in the admin interface
2. Select the time period you wish to analyze
3. Filter by service, route, or team to narrow down the results
4. Export reports in various formats for further analysis
## Security Considerations
When configuring the Edge Service, keep these security best practices in mind:
1. Use strong passwords for admin accounts
2. Implement the principle of least privilege for team permissions
3. Regularly rotate API keys and credentials
4. Enable TLS for all service-to-service communication
5. Configure appropriate CORS policies for browser-based clients
6. Implement IP-based access controls where appropriate
### JWT Token Configuration
The Edge Service can be configured to validate JWT tokens issued by Keycloak:
```yaml theme={null}
spring:
security:
oauth2:
resourceserver:
jwt:
issuer-uri: https://keycloak.example.com/realms/linqra
```
By following these guidelines, you can effectively manage and secure your Linqra microservices architecture through the Edge Service.
## Troubleshooting
### Common Issues
* **Service Not Found**: Verify the service is registered with Eureka and the service name matches the lb:// URI
* **Authorization Failure**: Check that the required scopes are correctly set and the user has the necessary permissions
* **Invalid Routes**: Ensure the path patterns don't conflict with other routes
* **Performance Issues**: Monitor rate limiting and circuit breaking configurations
### Logs and Diagnostics
The Edge Service logs can be found at:
```
logs/edge-service.log
```
Increase logging level for detailed diagnostics:
```yaml theme={null}
logging:
level:
org.springframework.cloud.gateway: TRACE
org.springframework.security: DEBUG
```
## Next Steps
After configuring the Edge Service, consider:
* Setting up a production-ready deployment with high availability
* Implementing a CI/CD pipeline for route configuration
* Integrating with external monitoring and alerting systems
* Developing custom filters and predicates for specialized routing needs